Create groups
Overview
Arranging Agents in groups can simplify management of your Resilio deployment. Grouping enables:
- Bulk-updating Agent configuration. For example adjusting Agent's settings in Agent Profile or a bandwidth limiter.
- Simplified Agents assignments to Jobs. Instead of adding them one-by-one, you can create a group of Agents and assign in when configuring the Job.
- Automate adding Agents to Jobs using the Auto assignment feature.
- Introducing high-availability features to your deployment and scaling-out to maximize transfer speeds (applicable to Resilio Active Everywhere 4 and newer).
Create a group
To create a group:
- In the Management Console, select Groups, then click + CREATE NEW GROUP.
-
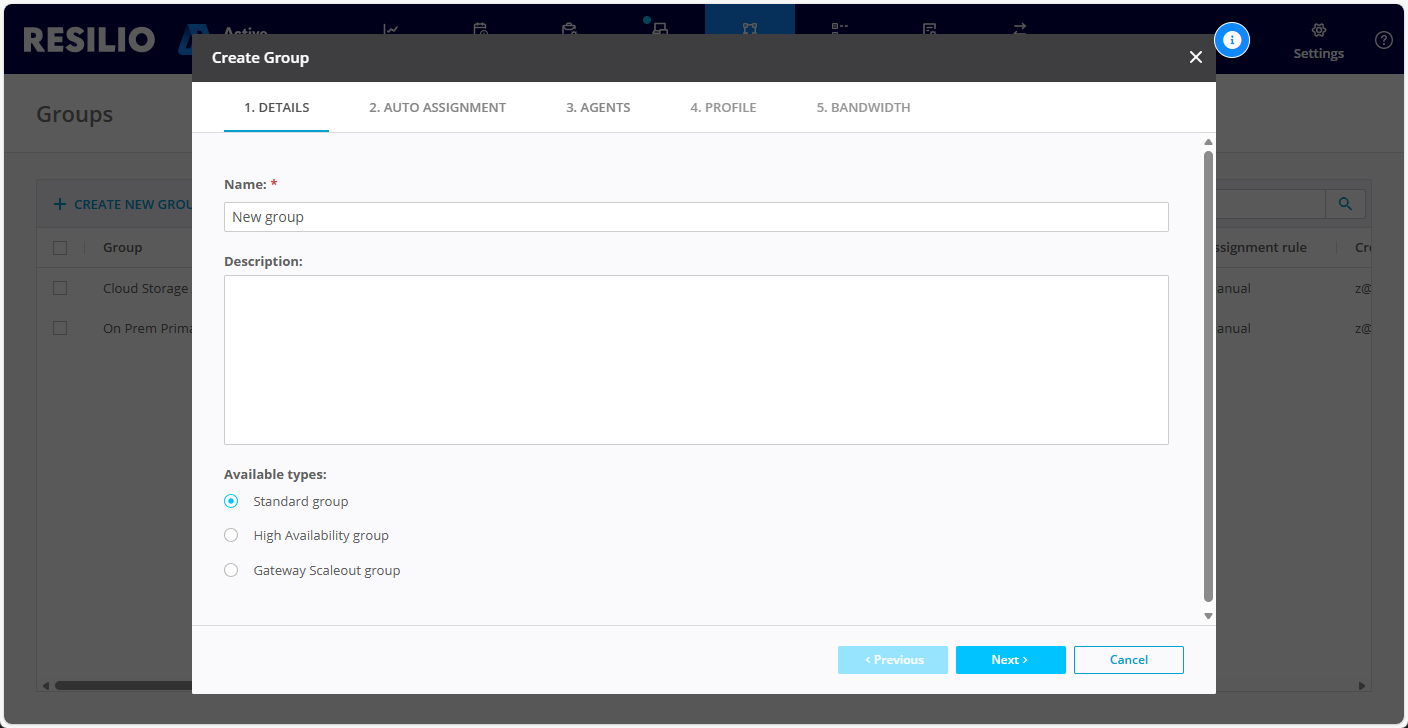
In the DETAILS tab:
- Enter the group name.
- (Optional) Provide a description that will help other administrators understand the purpose of the group.
-
Select group type.
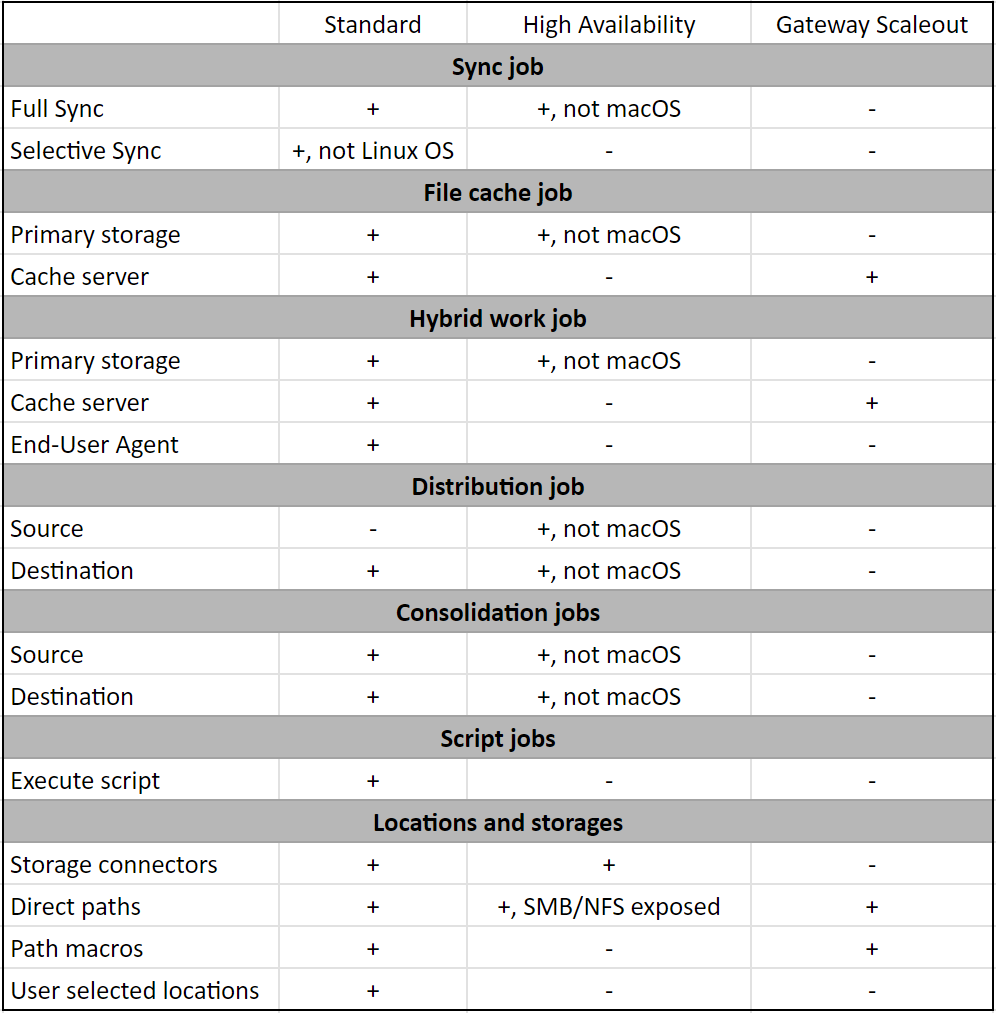
- Standard group - Standard Agent group that can be assigned to any Job type. Agents participate in the Job individually but they're managed as a group.
- High Availability group - Agents in a high-availability group operate in active-passive arrangement ensuring continuous operations in case of the leader Agent failure. For more information, see High Availability groups.
- Gateway Scaleout group - Workloads in a Gateway Scaleout group are distributed across the Agents within the group to maximize transfer speed. Gateways Scaleout groups can only participate as Caching Gateways in File Caching and Hybrid WOrk Jobs. For more information, see Speed scale-out cluster.
Groups and Jobs
Group type determines the kinds of Jobs an Agent group can participate in and the capacity in which it participates.
-
Click Next.
-
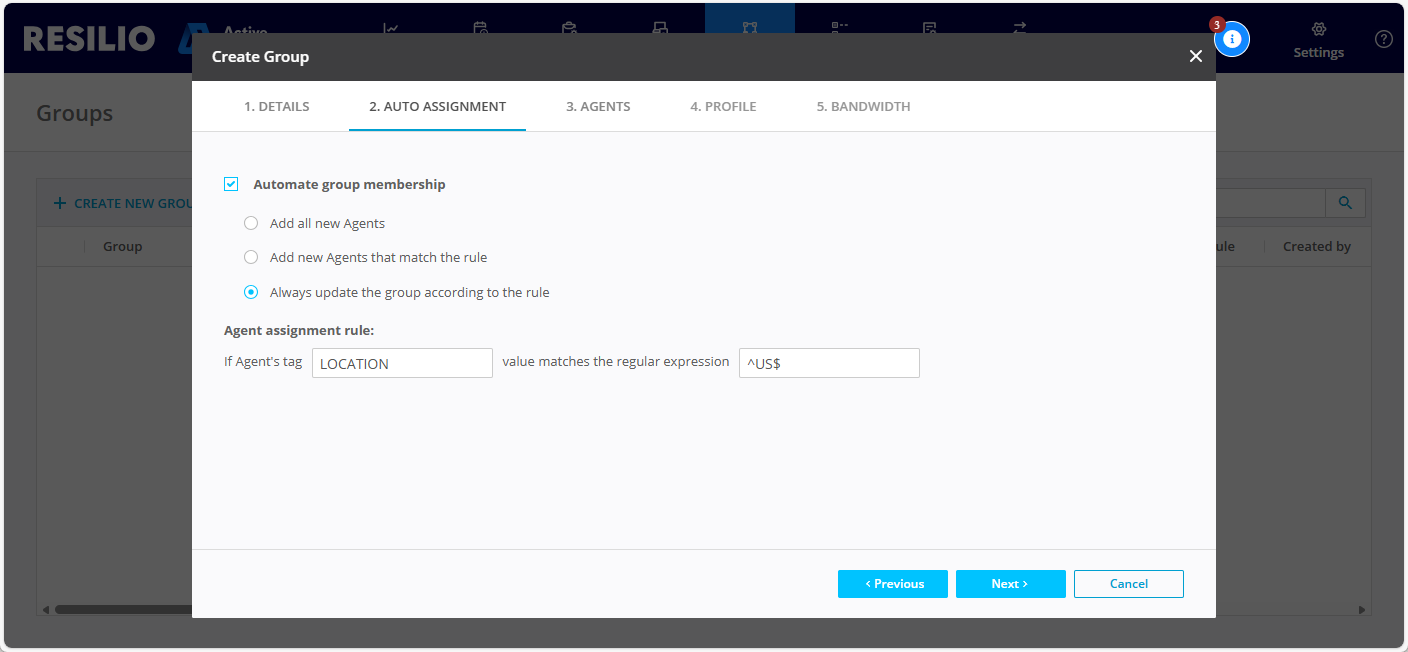
(Optional) In the AUTO ASSIGNMENT tab:
- Select Automate group membership option to assign Agents to this group automatically.
-
Select automated group assignment mode:
- Add all new Agents - Add all newly provisioned Agents to this group.
- Add new Agents that match the rule - Add newly provisioned Agents that match the tag-based rule.
- Always update the group according to the rule - Apply the rule to all Agents and update the group assignment accordingly.
-
Add an Agent tag and provide a regular expression for string matching.
Regular expression standard
Regular expression should be provided according to the ECMAScript/ECMA-262 standard.
-
Click Next.
-
In the AGENTS tab, select Agents that you want to assign to this group, then click Next.
Note
Manual Agent assignment isn't available if you chose the Always update the group according to the rule auto-assignment option.
-
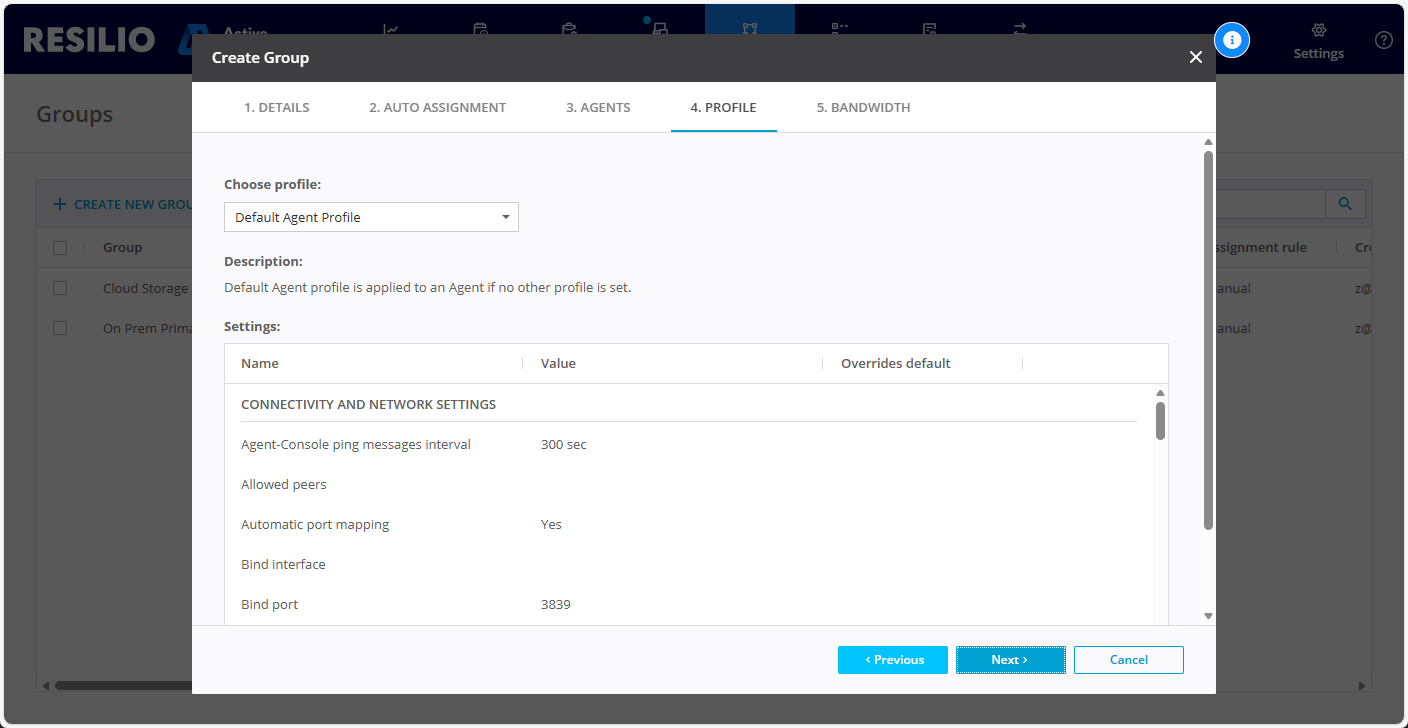
In the PROFILE tab, choose the Agent Profile, then click Next.
Note
If one of the Agents belongs to a different group, you won't be able apply an Agent Profile other than the one that the Agent has been assigned.
-
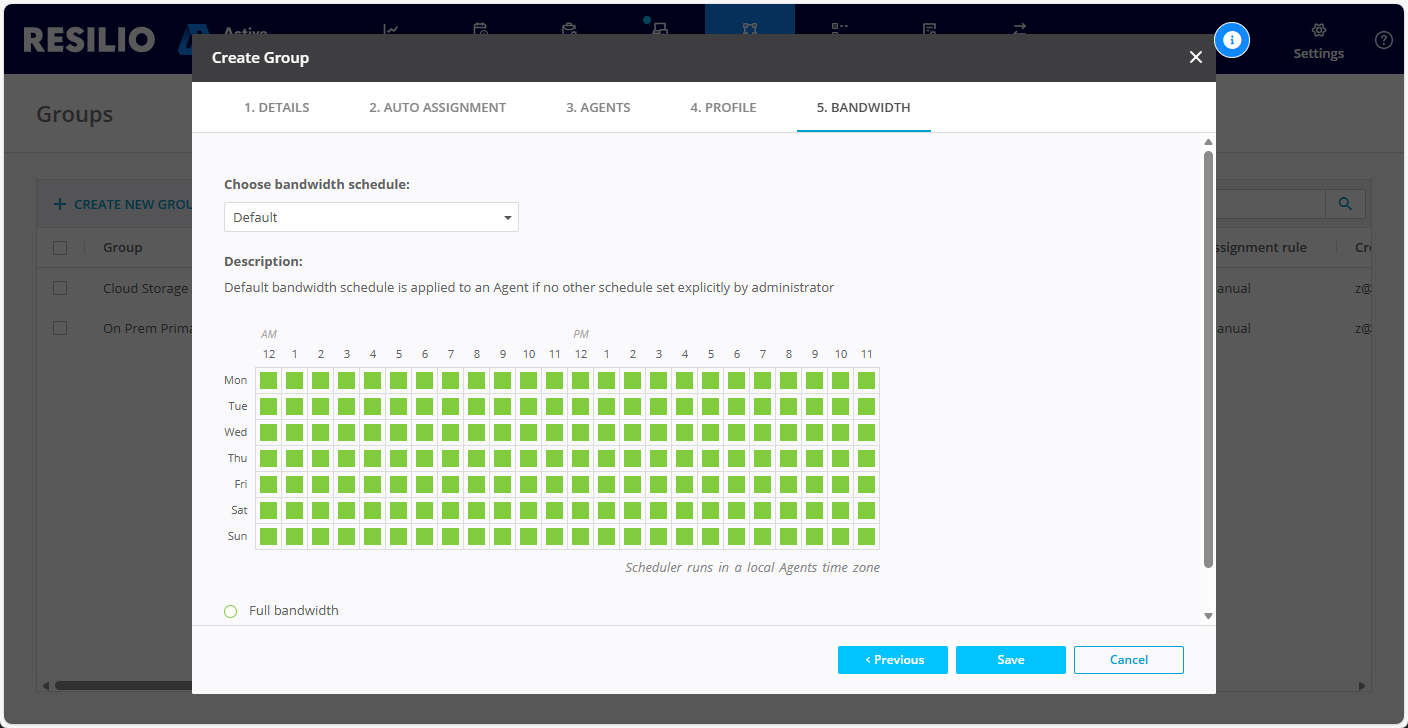
In the BADNWDITH tab, choose the bandwidth schedule, then click Save or Save and re-sort for Always update the group according to the rule auto assignment mode.
Note
If one of the Agents belongs to a different group, you won't be able apply a bandwdith schedule other than the one that already assigned to the Agent in a different group.
Related topics: