Kathy Zhong
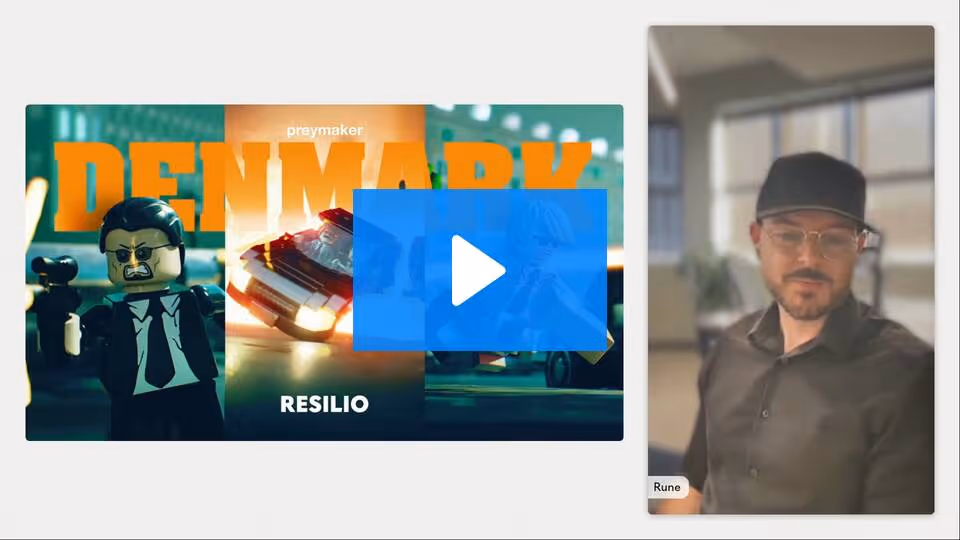
Hi, everyone. I am Kathy Zhong, and welcome to Resilio's latest Move Faster live event, making the Denmark movie. We're holding these Move Faster events to share strategies, insights, and hard-won lessons behind moving data at the speed of business directly from industry experts. Today's expert, we have Rune Holst Månsson from Preymaker joining us today. As a creative leader and artist at Preymaker, Rune is developing a sustainable future for artists and fostering the creative possibilities of real-time work. Rune, are you ready to take us behind the scenes of Denmark?
Rune Holst Månsson
Yes, I'm ready. Thank you very much for that introduction. So hi, good morning, good afternoon everybody. I'm Rune, and I'm a creative at Preymaker, and I'm excited to share our latest project with you, Project Denmark, but instead of just showing you the film, I want to show you how we actually made it.
Now, creating a film across multiple time zones, that's a bit of a challenge. There's always little hiccups along the way, timing issues, tech delays, stuff like that. That's where our partners at Resilio come in, so I want to give a huge thank you to them for not only hosting us today, but also being the backbone of this production. This software helped us stay in sync no matter where anybody was on the globe.
So when an artist in LA hit publish on an animation, it would be immediately available to the rest of the team around the globe. That meant that we could keep the creative momentum going without waiting around for uploads or delays of any kind. It was, in an word, seamless to us.
Where did this all start? So it simply started as a rigging research project. Our initial goal was simply to achieve expressive Lego style faces in a real time environment. We built a prototype facial rigging system that we called JPC that would help us map shrink wrap deformations onto a joint driven rig. To validate the new rigging system, we created a short test sequence in Maya. To test the rig, we built this little action short of a mini fig diving for cover dodging gunfire. As you'll see, there's a little twist at the end, but this is where things really clicked for us.
When we watched it back and started showing it around to other people at the studio, two things became really clear.
First, we wanted to avoid an overly smooth CG look, so we switched to animating on 2s. We'll loop this in the meantime. There we go. So we switched to animating on 2s as a way of paying tribute to the Lego Stop Motion fan community. And then the second thing that happened was that everybody at the studio loved it, and this reaction is what pushed us to expand the test into a full-blown short film.
So once we were committed to making a short film, we kicked things off with the lead animator in South Africa and the director in LA working really closely together. They started with loose sketches to feel out the rhythm, the visual rhythm and the key moments of the movie, then moved quickly into Maya to block out cameras and shot compositions. In hindsight, jumping in without a proper script was a huge learning curve for us. We were basically writing the film inside the layout stage, finding a story at the same time as we were staging the shots, which meant a lot of iteration to balance clarity with nice cinematography. Because all of that was happening directly in 3D, keeping the lead animator and the director in sync was critical. Both needed to be able to open each other's scene files and make changes rapidly. This is where Resilio really became the backbone of the process.
It automatically synced Maya scenes and publishes between LA and South Africa, and they were always looking at the same version as a result of this. And as more artists joined the project later on, the same setup kept the growing team aligned and stopped the pipeline from getting really messy and confusing.
So next, we took a deeper dive into JPC, our facial rigging tool. To hit that high-end Lego movie style close up, we knew that simple animated textures weren't going to cut it. They pixelated in closeups and they get incredibly heavy once you have a bunch of characters on screen, and every little change to an expression would have meant re-rendering a whole set of texture sequences. Instead, JPC, which is Joint Point Constraint, uses what we called a pseudo 2D rig built out of actual geometry. We created these nice shrink-wrapped deformations on detailed layered face geometry, and JPC automatically transfers this data onto a lightweight joint only rig that is optimized for Unreal.
Under the hood, the tool is doing all the hard work, procedurally placing joints per vertex and handling the skinning. For our animators, it was simple. They run the tool... hoo-ah, and when a green ring appears around the screen that's the signal that the rig is clean, optimized, and ready for publish. Because everything is driven directly in Maya using geometry, we basically skipped animating textures entirely, which not only scales better to crowds, but also lets us bypass an entire textured re-render and quality assurance step each time we needed to make a tweak.
So solving faces were only half the battle. We also needed a really solid way to build out the world of actual Lego bricks. So we wanted to tap into the collective creativity of the global Lego community. We built a Houdini pipeline to ingest the massive open source outdoor library as a result of this. On top of that, we wrote a custom Python tool that regenerated all 25,000 unique brick types. This wasn't just any dumb importer. The script rebuilt the parts at a higher fidelity, cleaned up naming, and prepared all of the right attributes for Unreal.
Our first plan was to keep everything in USD, but in practice, as we found out, Unreal 5.3 was not quite ready for the ask that we gave it. So we pivoted to FPX plus a Nanite workflow, which turned out to be the right decision. Because LDraw stores the brick graphics as actual geometry, we could keep everything crisp and sharp without the need for additional heavy textures. In the end, we compressed the full curated library of 25,000 pots down to around 13 gigabytes, a complete digital Lego kit ready to drop straight into layout.
So once we had our full digital library of bricks, the next step was to actually build something out of this. For that, we used BrickLink Studio, which is the standard tool for the Lego fan community. We wired our Houdini pipeline straight into the studio files so we could ingest the data directly. We took a hybrid approach. A few hero buildings were custom-made for the film, but we also leaned heavily on existing community models, and honestly, I got to pay tribute to these people. These community sets were incredible. A lot of them were better than what we could have recently built ourselves within the schedule.
To get the right look, we also got pretty nerdy about colors. We took the official Lego hex values and converted them into 16 bit ACEScg values, which gave us true Lego colors while staying consistent with the rest of the VFX pipeline.
Next came optimization. Our first instinct was to be purist and instance every single brick like we heard was done on the Lego movie. But when you try to instance around 100,000 bricks for just a single building, Unreal tends to have an opinion about it, and that opinion is about five frames per second. I'll talk about how we fixed that later when we got into asset prep, but let's just say per brick instancing did not survive the transition.
To bridge the gap between standard 3D modeling and Lego construction, we built Brickmaker, a custom Houdini tool that turns any geometry into a Lego creation. The workflow kind of mimics how humans build. It voxelizes the mesh, then fills the volume layer by layer from the bottom up. The logic is smart. It first fits the largest possible bricks to fill the core, then creates a shell of progressively smaller pieces, and then finally applies slope bricks to smooth out the contours. This was important as we focused heavily on silhouettes. The tool uses placement rules like randomization and symmetry to avoid those jagged voxelized edges that you would usually see. It would also help minimize light leaks later on in lighting. The best part is scalability. Once the logic is set, we can generate our million brick giant for a hero shot, or a low res version for a background crowd agent, all with the same input mesh.
So back to that performance bottleneck I talked about. We found that instancing bricks individually, whether through USD or Niagara, hit a hard ceiling at around 100,000 pieces in Unreal 5.3. This sounds like a lot until you realize that our scenes would require tens of millions of bricks to be constructed. To scale up, we switched to our clustered FBX workflow. We used Houdini to fuse bricks into larger chunks and aggressively call any unseen interior geometry. This allowed us to feed clean optimized meshes directly into Nanite, and this seemed to be the magic bullet that got us from 5FPS back to real time.
For the look, we also avoided making unique textures. Instead, we maintained a strict textile density across every asset. This allowed our ubershader to procedurally project fingerprints and imperfections in Unreal, keeping memory costs manageable. We also had to be strategic about hierarchy. Static buildings were merged into a single asset for speed, while moving structures like the starship that you saw with folding wings remained as separate clusters to give animators more control. And for the explosion, we needed total control. A standard particle sim wouldn't work because we needed that specific, chubby, brick-by-brick stop-motion look.
So we did something unconventional in Houdini. We took every single frame of the simulation, merged them into a massive static point cloud, and then for each point, carried not just position and rotation, but also specific attributes like frame ID and temperature. We exported this as a custom JSON file, which is a simple data list, which we fed into Niagara and Unreal. The biggest challenge here was fighting Unreal's instinct to smooth things out. Since we were animating on 2s, we didn't want bricks sliding or scaling between frames, so we forced Niagara to read the JSON file and make the bricks pop into existence exactly at the correct frame. This guaranteed zero drift and a perfect stop-motion feel.
Our biggest challenge was self-inflicted. We decided to work at two millimeter scale to ensure predictable shading, and in theory, this is the right way to do it, but in practice, it was a major headache. Unreal is not built to render things at this tiny scale, so it would struggle to resolve the difference between our tiny meshes and embedded rigs. We effectively broke the import pipeline. Geometry came in tiny, rigs came in huge and generated an effect that we affectionately called the land of the giants. The engine also struggled with math at this very tiny size. We saw floating point errors causing animation jitter, polygons flickering, corrupt normals, and Lumen, the built-in lighting system, behaving unpredictably because the system wasn't created for scales that small. We learned the hard way that sometimes you just need to fake the scale in order to make the process work.
So the scale issue didn't just break the math. It also broke the user experience. Honestly, navigating the viewport sometimes felt like operating a microscope while wearing boxing gloves. The camera was simply too fast and too clumsy for such tiny objects. Because our assets were physically microscopical, Unreal assumed they were also insignificant, which meant the built-in LOD calling triggered constantly, causing assets to pop in and out. Framing a shot became a battle against the near clipping plane. We tried to get close for a dramatic micro shot and the subject would just vanish because the camera literally couldn't focus on anything that close.
At this point, we faced a crisis. We were in too deep in production to remodel and republish every single asset and animation and camera at a new scale in Maya. This would have killed the schedule, so we needed a way to fix the scale globally inside Unreal without touching any of the source files, and that led us to our savior, the Master Blueprint.
The Master Blueprint is a class in Unreal. Think of it as a universal wrapper for every object in the film. Instead of resizing a thousand files in Maya, we simply parented every character, prop and building to this Master Blueprint. This gave us a single global control to scale everything in the world up to a size that the engine could actually handle. It also became another backbone of our pipeline. Because of inheritance, if we added a feature to the master like FXLogic, CFX hooks, or apparel slots, every asset in the "game" would inherit that trade automatically. This saved the project. It eliminated the need to re-cache animation and cameras, allowing us to fix all the scale-related problems instantly without breaking the art pipeline.
The next thing we had to tackle was handling gunfire. It presented a unique challenge. Originally, every single bullet tracer in Maya was its own rigged piece of geometry. When we scaled that up to hundreds and then thousands of bullets, the import process became unmanageable. To fix it, we consolidated the volleys into a single Alembic cluster, essentially creating a geometry flip book. While this was heavier than we would have liked, it solved the most important problem, determinism. It ensured that every volley played back exactly the same way frame after frame without simulation drift or variation. Looking ahead, the dream is to move into Niagara for efficiency. The challenge there is taming the simulation. We need to make Niagara fully deterministic so that the choreography remains art-directable and perfectly repeatable, so this is on our roadmap for future projects.
Bringing the explosion into Unreal revealed a new, tricky, technical nuance, subframe syncing. We imported the Houdini explosion into Niagara, and when we slowed the shutdown for dramatic effect, the systems drifted apart. The FBX animation and the Niagara particles calculated their in between frames differently, causing mismatch in motion. To fix this, we took manual control. We drove the Niagara system explicitly through sequencer tracks, specifically controlling life cycle and desired age particle attributes, and utilized simulation caching. This forced both systems to march to the tact of the exact same beat, frame by frame.
Then came the issue of motion blur. Because we were animating on 2s, the stop-motion looked standard... Sorry. To get the stop-motion look, standard motion blur broke down completely. It would strobe, giving us intense motion blur on frames of movement and zero motion blur on hold frames. It was distracting and messy. So the cleanest solution was simple. We turned off motion blur entirely.
To handle the look of the film, we adopted a one shader to rule them all philosophy. We built a single ubershader that drives every Lego surface in the project. Instead of making thousands of unique texture maps, this shader is procedural. It mathematically projects fingerprint scratches and micro surface variation onto the bricks. This is what gives the plastic that tactile lived-in feel, like a toy that's actually been played with. The centralization was a massive performance win. Because everything shed the same shader logic, we drastically reduced shader complexity and compilation times. We even extended this into our effects. For the explosion, we used custom Houdini attributes from our JSON files to drive color per instance, but they shared the same ubershader. This meant that our exploding bricks shared the same rich, high quality shading as our hero characters.
For lighting, we delivered 44 unique shots across four sequences. To manage this complexity, we used a strict hierarchy: master levels for layout, sublevels for lighting setups, and sequence overrides for per shot adjustments. This workflow essentially mirrored traditional VFX render layers. It allowed us to tweak the atmosphere of a single shot without breaking the rest of the sequence. The engine behind this was hardware accelerated lumen. Because lighting and reflections were fully interactive, we never baked a single light map. This real-time feedback changed how we collaborated. We performed virtual location scoutings, and the director and the lighting artists would fly around the scene experimenting with angles and light directions. We actually discovered quite a few entirely new shots this way without ever returning to Maya. Finally, to ensure a film great finish, the entire project was authored in ACES. This gave our color artists linear data that integrated seamlessly with standard grading workflows.
And to wrap things up, Project Denmark was a massive technical puzzle. We navigated everything from our custom JPC rigging tool and Houdini brick pipelines to fighting the scale issues in Unreal. But beyond the polygons and the shaders, this project was a test of global collaboration. We had artists across different time zones pushing heavy Alembic caches, constant layout iterations, and massive project files every single day.
That is why I want to close by saying a huge thank you to our friends at Resilio one more time. As we showed you, our pipeline relied on thousands of files from Maya layouts to Houdini caches, instantly syncing across studio sites. Resilio made the process seamless and invisible to the artist, allowing us to focus on art rather than technicalities. They made sure that whether we were in LA, New York or South Africa, we were all looking at the exact same thing at all times, so thank you for listening.
Kathy Zhong
Thank you for the presentation, Rune. If you want to see the Denmark movie for yourself or learn more about Preymaker's approach, visit DenmarkMovie.com, and to explore what we do here at Resilio in helping teams move creative assets at scale, check us out at Resilio.com.
I am Kathy Zhong, and if you've enjoyed our live event today, please stay tuned for our future Move Faster events, and we've got more conversations coming in the pipeline on technology behind faster production.
Thank you for joining us today.
Rune Holst Månsson
Thank you.
Kathy Zhong
Bye, everyone.
Rune Holst Månsson
It's a pleasure.